Most great Pro renders aren't generated in one shot. They're generated in three or four — a first pass that establishes pose, composition, and identity; then a refinement pass that fixes the things the first pass got wrong. The refinement pass costs fewer charms than starting over, and it almost always gives a better result than re-rolling the dice on a fresh prompt.
This article shows you the refinement loop.
The img2img workflow
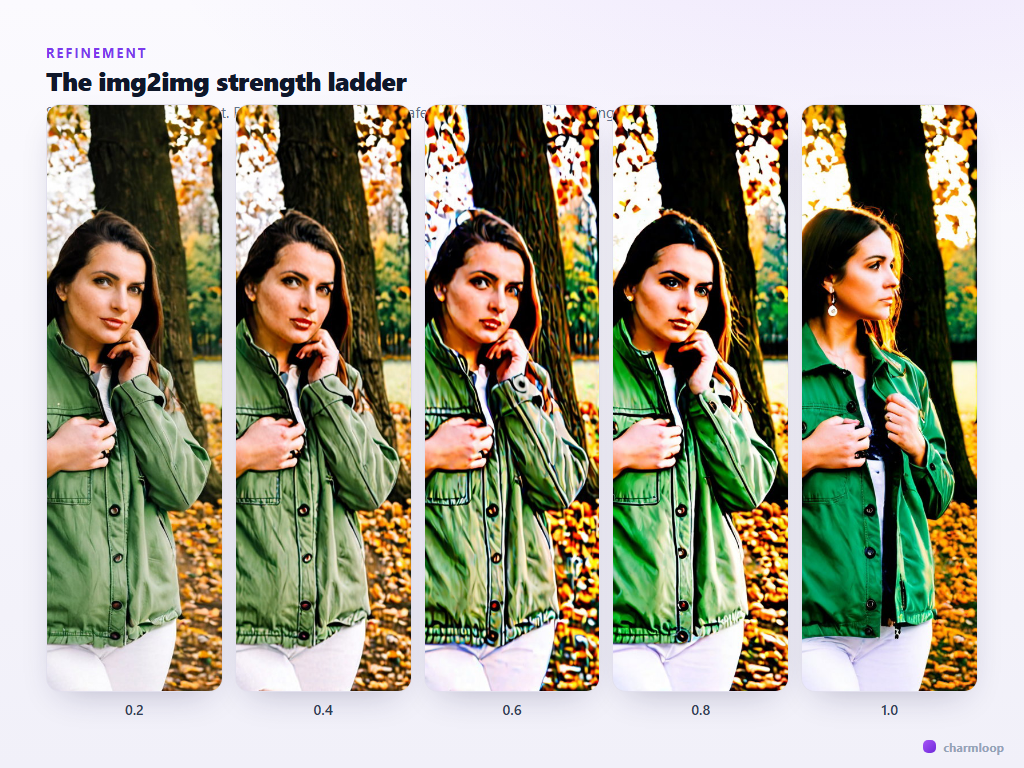
The Pro generator's Img2img panel lets you pick any existing image — from your gallery, from this session's recent generations, or uploaded — and use it as the starting point for the next render. The model takes the image, partially destroys it, and rebuilds it according to your prompt. The amount it destroys is controlled by the strength slider (sometimes called denoise in other tools).
- Strength 0.2–0.4 — gentle. The output looks almost identical to the source. Use this for tiny tweaks: change lighting mood, shift a colour, smooth skin.
- Strength 0.5–0.65 — moderate. Composition is preserved, but the model has room to redraw details. The default useful range for refinement.
- Strength 0.7–0.85 — aggressive. The source is more of a hint than a base. Use when you want to keep pose and rough composition but allow major redraw.
- Strength 0.9–1.0 — effectively a fresh generation that uses the source as colour noise. Almost never the right answer for refinement.
Fix one thing per pass
The discipline that separates fast iterators from slow ones: change one variable per refinement pass. If you change the prompt, the strength, the model, and the seed all at once, and the new render is worse, you don't know which change broke it. If you change just the prompt and regenerate, the answer is in front of you.
A typical refinement sequence:
- Pass 1 (generate). Base prompt, batch of 3, free seed. Pick the one with the best composition. Note its seed (it shows in the hero footer when the render finishes).
- Pass 2 (img2img, strength 0.6). Source = the chosen render. Lock the seed. Edit one thing in the prompt — usually lighting or mood.
- Pass 3 (img2img, strength 0.35). Source = pass 2. Turn on Face Detailer and Hand Detailer in the Post-processing panel. Same prompt. This pass is for fixing details, not changing them.
- Pass 4 (optional). If skin is plasticky, enable Skin Enhancement in Post-processing and run one more img2img at strength 0.25.
Four passes from a 1-batch base, with one variable changed at a time, gets you to a finished image far more reliably than ten re-rolls of a full prompt.
When to use FaceDetailer in refinement
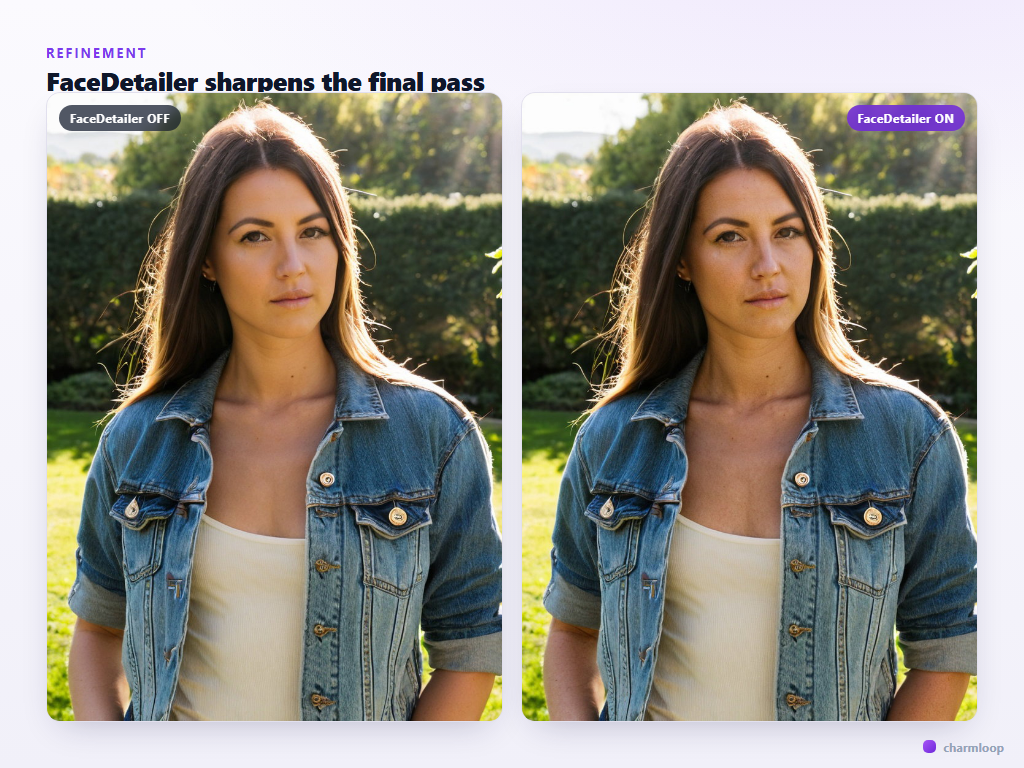
FaceDetailer is a refinement tool, not a generation tool. Use it on the final pass, when the rest of the image is where you want it and only the face needs sharpening. Running FaceDetailer on every pass wastes charms — early-pass faces are going to be redrawn anyway.
The exception: identity-critical renders where you want every intermediate pass to look like the right person. For those, keep FaceDetailer on throughout, and accept the slight per-render cost.
Negative prompts in refinement
A useful pattern: keep two negative prompts saved. A generation negative (covering the usual SDXL failure modes) and a refinement negative that adds anything the early passes kept producing. If your first three passes all came out with a strange duplicate finger, add extra fingers, duplicate fingers to your refinement negative and run the next pass — the negative prompt is far more effective when targeted at a known failure.
The bookmark icon next to each prompt field saves the prompt; use it for both the positive and the negative.
Don't chase a broken first pass
There's a temptation to keep refining a render that was never going to work — wrong pose, wrong lighting, wrong composition. Refinement makes a good image great. It doesn't rescue a bad one. If after pass 2 the composition is still wrong or the identity isn't coming through, go back to the generation step with a sharper prompt, a different aspect ratio, or a higher face-preservation tier. Starting fresh after pass 2 is cheap; chasing a broken render through six refinement passes is not.
Saving the version you keep
When you land on a render you want to keep, the Pro generator's hero shows a save action. Save it. The image lands in your gallery and becomes available as a source for future img2img passes and as a reference for future face-flow generations.
Name your favourite settings as a preset — the Preset bar above the panels lets you store the whole stack (prompt, model, sampler, dimensions, face flow) under one name. Next time you want to make a similar image, load the preset, change the prompt, and you skip the setup.
Presets compound. After a few weeks of using the Pro generator, you'll have three to five named setups that match your most common use cases — a studio portrait preset, an environmental wide preset, a phone-wallpaper vertical preset. Loading a preset and changing only the prompt gets you to a finished render four or five times faster than building from defaults, and the consistency of look across your saved gallery rises sharply. The next article shows three concrete recipes you can save as presets the first time you run them.
Next: putting it all together with named, copy-paste-ready recipes you can run today → Recipes.