The first four articles in this hub gave you the levers: prompt structure, face identity, composition, refinement. This article gives you three full setups that combine those levers into something you can run today.
Each recipe is SFW, fully named, and tested against the Pro generator's current default models and panels. Treat them as starting points — swap your own pinned avatar in, change the lighting word, switch the aspect ratio — but the structure works as-is.
A note on cost. The face-flow tier and the post-processing toggles are the two biggest cost levers in the Pro generator. Recipe 1 spends a little extra on identity (IP-Adapter + ReActor) because the portrait is identity-critical. Recipe 2 saves charms by dropping to ReActor only because the face is small in frame. Recipe 3 spends on identity again because half-body framing puts the face back at viewer-reading size. Match the spend to what the viewer will actually look at.
Recipe 1 — Studio portrait
The most universally useful render in the catalog: a clean, well-lit head-and-shoulders portrait that looks like it was shot by a professional. Use this for profile pictures, character introductions, or anywhere you need the same person to look unambiguously themselves.
A clean, identity-stable head-and-shoulders that reads as a professional headshot. Profile pictures, character reveals, brand portraits.
head-and-shoulders portrait, soft studio key light from camera-left, gentle fill from camera-right, neutral grey seamless background, white cotton button-down shirt, looking directly at camera, calm expression, 85mm, f/2.0, photograph
low quality, blurry, jpeg artifacts, watermark, signature, text, extra fingers, deformed hands, plastic skin, cgi, 3d render, oversaturated, harsh shadow
Face Detailer ON, Skin Enhancement ON, Hand Detailer OFF
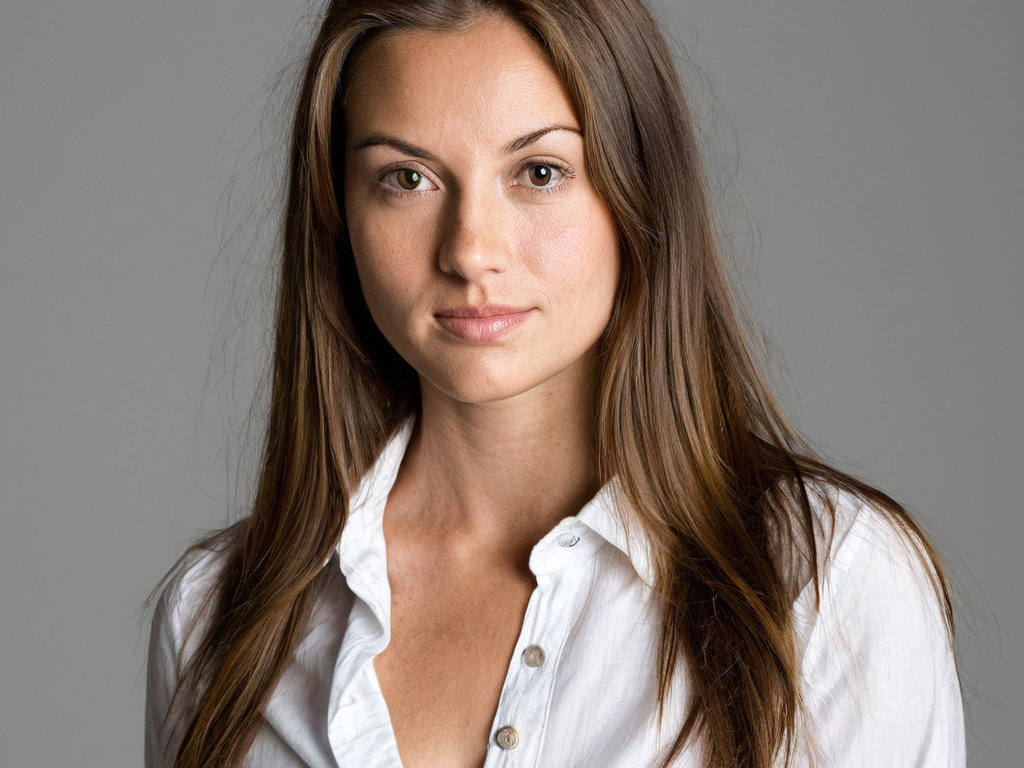
The trick with this recipe: keep the prompt short and lighting-specific. Don't add adjectives. The face flow handles identity, the post-processing handles detail, and the prompt handles staging. If the result is plasticky, drop CFG to 5.5 and rerun. If the face isn't recognisable enough, switch face flow up to InstantID + IP-Adapter for the next pass.
Recipe 2 — Environmental wide shot
For when the scene carries the story and the person is part of it — travel-style imagery, character-in-place compositions, banner art. Wider aspect, wider lens, looser framing. Identity matters but doesn't dominate.
A character in a place where the place tells half the story. Travel, lifestyle, banners, social-card backgrounds.
a young woman in a long camel coat walking past a row of bookshop windows on a wet cobblestone street at dusk, soft ambient light from the windows, warm interior lights reflected in the puddles, light fog, 35mm, f/4, cinematic, photograph
low quality, blurry, jpeg artifacts, watermark, signature, text, extra fingers, deformed hands, plastic skin, cgi, 3d render, overexposed, washed out
Face Detailer OFF, Hand Detailer OFF, Color Correction ON
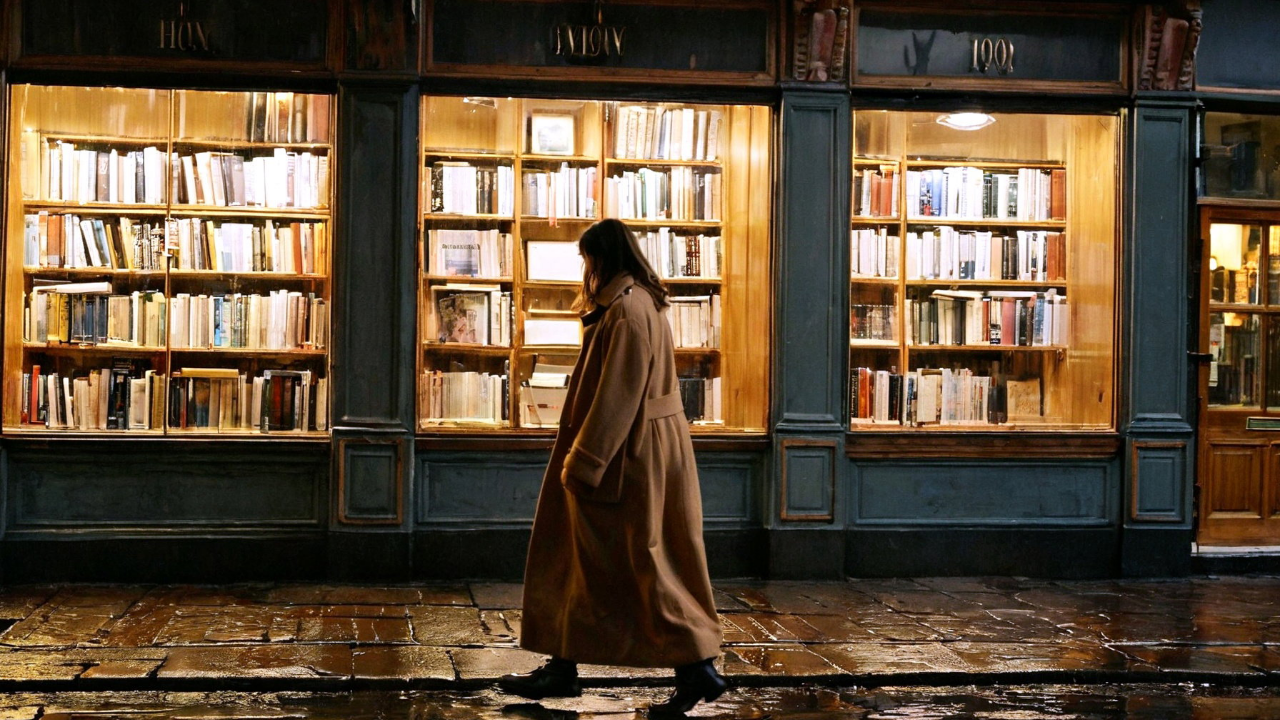
Why batch 3 here: environmental shots are higher-variance than studio portraits. The model has to compose buildings, lights, reflections, and a human all at once, and three samples gives you a real choice instead of a forced pick. The FaceDetailer toggle stays off — the face is too small in frame for it to help, and you'd be spending charms on a region the viewer never reads.
Recipe 3 — Phone wallpaper vertical
A tall, image-first composition designed for a phone lock-screen or splash card. Vertical aspect, half-body framing, strong negative space top and bottom for clock and widgets, identity preserved enough to read as a specific person.
A vertical, half-body composition with negative space at the top and bottom. Lock screens, story backgrounds, vertical splash art.
half-body portrait of a woman in a knitted oversize cream sweater, standing against a deep teal painted concrete wall, soft window light from camera-right, hair tied back, looking off to the right of frame, generous negative space above and below, 50mm, f/2.8, editorial photograph
low quality, blurry, jpeg artifacts, watermark, signature, text, extra fingers, deformed hands, plastic skin, cgi, 3d render, cropped, frame, border
Face Detailer ON, Skin Enhancement ON, Color Correction ON
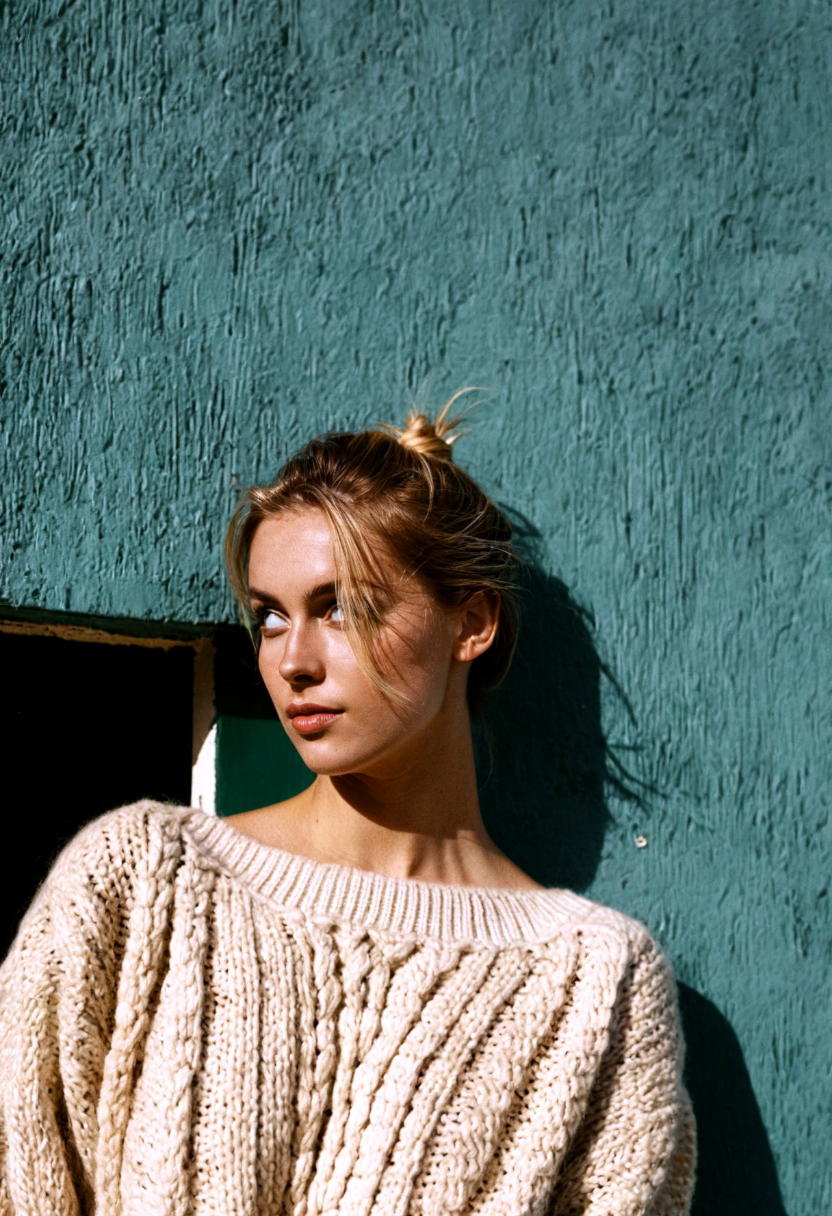
Two craft notes specific to this recipe. First, "generous negative space above and below" is doing real work — without it, the model centres the figure and you end up with a face exactly where the phone clock sits. Second, the off-centre gaze ("looking off to the right of frame") is what makes the image breathe vertically; gaze direction is the cheapest composition lever you have.
Working with the recipes
Each recipe is a baseline. Load it, run it, then change one thing per pass — see Refinement for the iteration discipline. If a recipe gives you a result that's almost right but the lighting feels wrong, change only the lighting word and rerun. If the identity isn't strong enough, move face flow up one tier. If the framing is off, change only the aspect ratio. Don't change three things at once and then wonder which change helped.
Save the version you like as a preset. The Preset bar at the top of the Pro generator's panels stores the whole stack — prompt, model, sampler, dimensions, face flow, post-processing — under a name you choose. Next time you want the same look, load the preset, swap in a new pinned avatar or change the scene words, and you skip ten clicks. A recipe you've personalised and saved as a preset is worth more than ten recipes you've only read about.
That's the hub. You now have prompting, identity, composition, refinement, and three recipes. Open the Pro generator and try one → Back to the Pro generator.